Mini Red Velvet Layer Cakes
Highlighted under: Bakery-Style Desserts
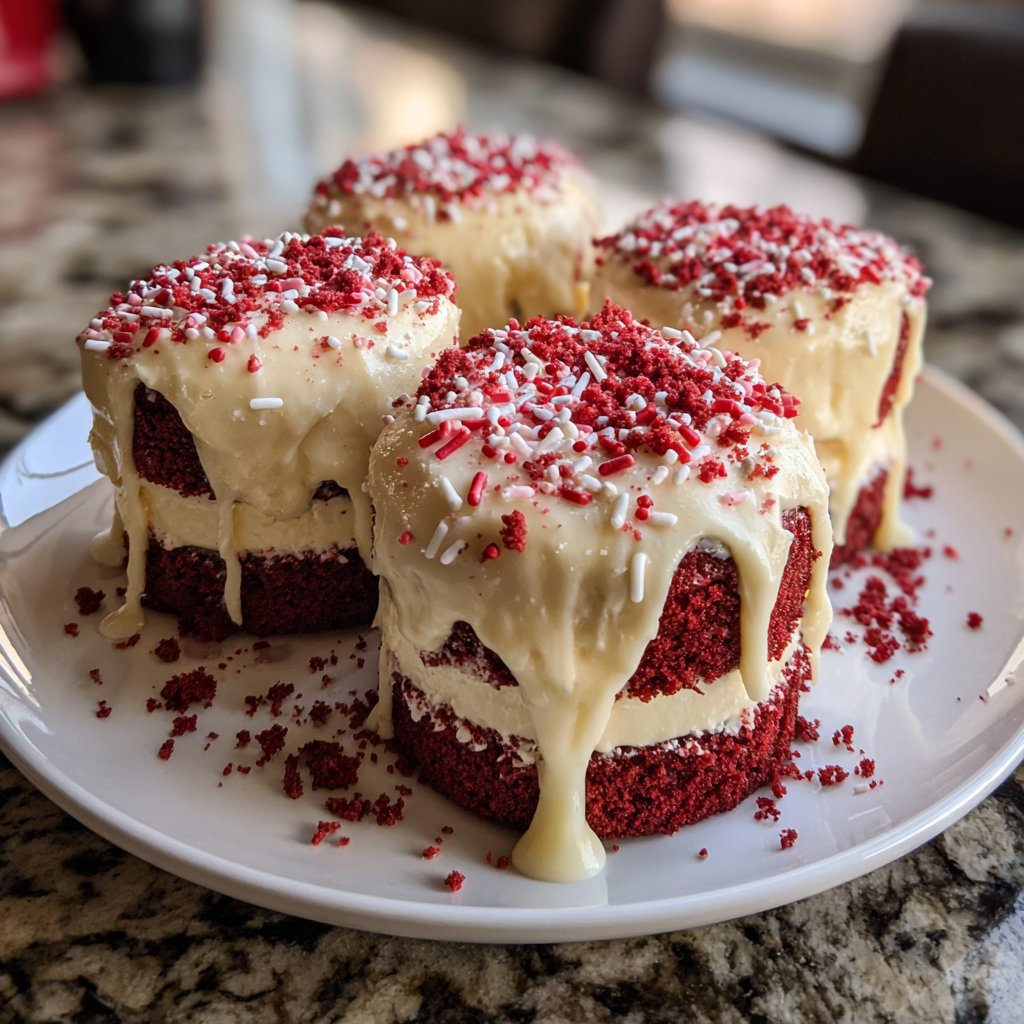
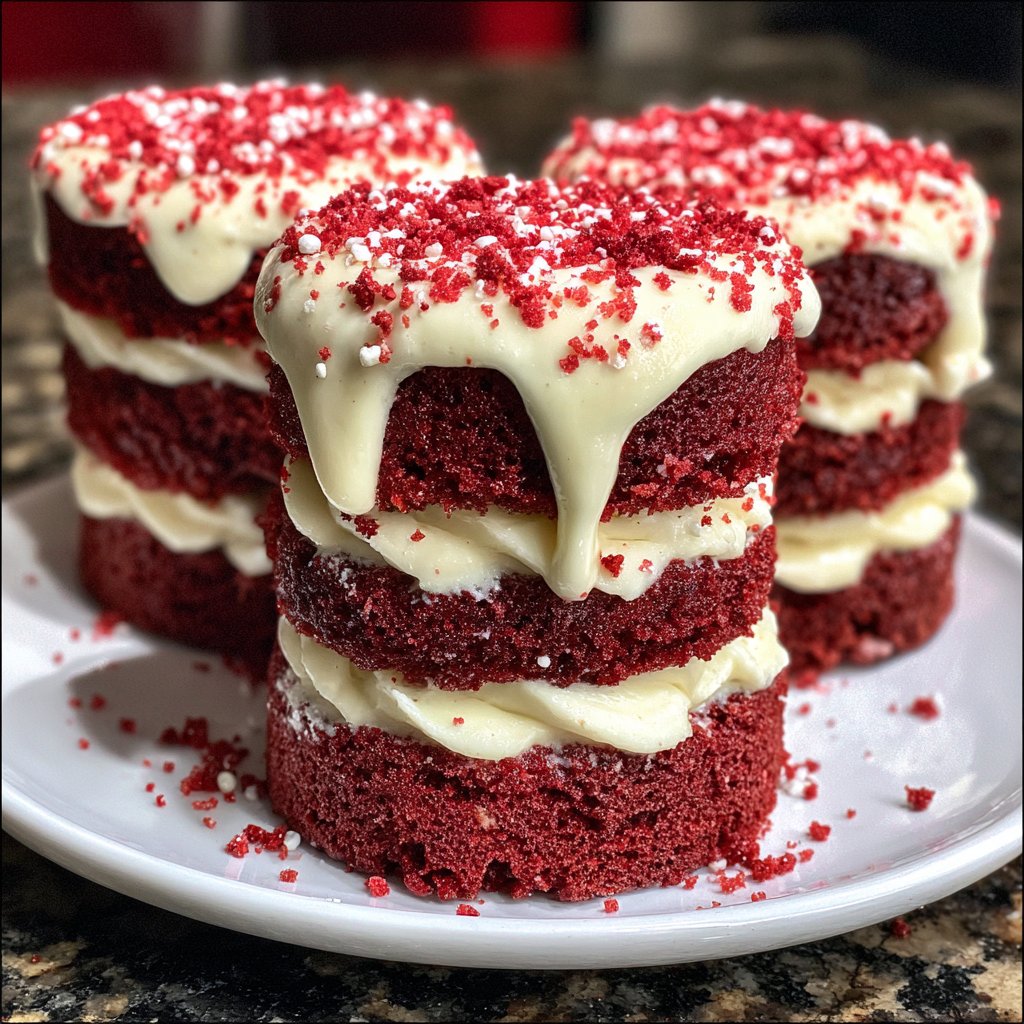
I absolutely adore these Mini Red Velvet Layer Cakes! They’re perfect for any celebration or just an indulgent treat when I'm craving something sweet. The vibrant red color and smooth cream cheese frosting make them incredibly appealing. I love how these miniature cakes allow for portion control while still delivering all that rich flavor. Baking them in small layers means they cook evenly, and the frosting is just the right amount to complement the cake. These tiny delights are sure to impress anyone who tries them!
When I first attempted to make these Mini Red Velvet Layer Cakes, I was surprised at how simple it was to achieve such a beautiful result. The combination of buttermilk and vinegar gives the cakes a unique tenderness that's hard to resist. I learned that using gel food coloring not only enhances the red color but also allows me to adjust the intensity to my preference.
The frosting was another adventure! I found that letting the cream cheese sit at room temperature makes it incredibly easy to whip into a smooth and fluffy consistency. If you want an ultra-delicious twist, try adding a bit of vanilla extract or even some chocolate for an unexpected flavor layer.
Why You Will Love This Recipe
- Rich chocolate flavor paired with fresh orange zest
- Creamy texture that melts in your mouth
- Perfect for celebrations or as a sweet indulgence
Baking Technique Tips
When creating these Mini Red Velvet Layer Cakes, it's crucial to measure your ingredients accurately. For the flour, using a kitchen scale can help ensure you have the right amount, preventing dry or dense cakes. Sifting the dry ingredients together can improve the cake's texture, incorporating air for a lighter result. Additionally, be careful not to overmix the batter; this can create a tough cake instead of a tender one.
Another key technique is to rotate your cake pan halfway through baking. This helps ensure even heat distribution, which is particularly important with small cakes that can bake quickly and may have hot spots in the oven. Keep an eye on the cakes in the last few minutes to avoid overbaking; they should pull away from the sides and spring back when lightly touched.
Frosting Considerations
The cream cheese frosting is a highlight of this recipe, contributing both richness and tanginess. To achieve a smooth frosting, be sure your cream cheese and butter are at room temperature before mixing. If your frosting seems too thick, add milk a tablespoon at a time until you reach the desired consistency. Conversely, if it's too thin, you can add a bit more powdered sugar in small increments.
For an extra layer of flavor in the frosting, consider incorporating lemon or almond extract, which complements the red velvet beautifully. If you want a more striking presentation, you can reserve some of the frosting to pipe decorations on top of the cakes once assembled.
Storage and Variations
These Mini Red Velvet Layer Cakes can be stored in an airtight container in the refrigerator for up to five days. If you plan to make them ahead of time, consider freezing the unassembled cakes. Wrap each cooled cake layer in plastic wrap and foil, and they can be frozen for up to three months. Just thaw them in the refrigerator overnight before frosting and assembling.
For a twist on the classic flavor, try adding finely grated orange or lemon zest to the batter for a refreshing citrus note that pairs well with the cream cheese frosting. You can also experiment with different extracts, such as vanilla or coconut, to change the flavor profile without altering the cake's structure.
Ingredients
For the Cakes
- 1 1/2 cups all-purpose flour
- 1 cup granulated sugar
- 1 teaspoon baking soda
- 1 teaspoon cocoa powder
- 1 teaspoon vanilla extract
- 1 cup vegetable oil
- 1 cup buttermilk
- 1 large egg
- 1 tablespoon red gel food coloring
- 1 teaspoon white vinegar
- 1/2 teaspoon salt
For the Cream Cheese Frosting
- 8 oz cream cheese, softened
- 1/2 cup unsalted butter, softened
- 4 cups powdered sugar
- 1 teaspoon vanilla extract
- 1-2 tablespoons milk (as needed)
Instructions
Steps
Preheat and Prepare
Preheat your oven to 350°F (175°C) and line a mini cake pan with parchment paper or grease it well.
Mix Dry Ingredients
In a bowl, whisk together the flour, sugar, baking soda, cocoa powder, and salt until evenly combined.
Combine Wet Ingredients
In another bowl, mix together the vegetable oil, buttermilk, egg, food coloring, and vinegar until smooth.
Combine Mixtures
Gradually add the dry mixture to the wet mixture and stir until just combined. Do not overmix.
Bake
Divide the batter evenly among the mini cake pans, filling each about 2/3 full. Bake for 15 minutes or until a toothpick comes out clean.
Make the Frosting
While the cakes are cooling, beat the cream cheese and butter together until smooth. Gradually add powdered sugar and vanilla until you reach your desired consistency.
Assemble the Cakes
Once the cakes are completely cooled, remove them from the pans. Layer them with frosting in between each cake. Top with an extra dollop of frosting.
Enjoy!
Pro Tips
- For a fun twist, try adding a hint of orange zest to the cream cheese frosting for extra flavor!
Important Ingredient Roles
Each ingredient in the Mini Red Velvet Layer Cakes has a distinct role that contributes to their overall flavor and texture. The buttermilk adds moisture and a slight tanginess, while the red food coloring gives that signature hue. The cocoa powder, though understated, deepens the flavor profile, making the cake rich and chocolatey without overwhelming the red velvet taste.
The egg not only provides moisture but also structure, helping the cake rise and maintain its fluffy texture. When baking, it's essential to use large eggs as specified, as smaller eggs might affect the batter's consistency. Using vegetable oil instead of butter keeps the cake moist and tender since oil remains liquid at room temperature.
Troubleshooting Common Issues
If your cakes dome significantly while baking, it may be due to the oven temperature being too high. Use an oven thermometer to check that it's set at the right temperature. Additionally, ensure your baking powder and baking soda are fresh, as expired leavening agents can lead to inadequate rise and unexpected textures.
For cakes that stick to the pan, ensure they are thoroughly greased, and consider using parchment paper for added protection. If your layers break when being removed, refrigerating them for a short while before assembly can help firm them up, making them less fragile.
Questions About Recipes
→ Can I make these in advance?
Yes, you can make the cakes and frosting ahead of time. Store the cakes at room temperature and the frosting in the refrigerator until you're ready to assemble.
→ What can I use instead of buttermilk?
You can easily substitute buttermilk with regular milk mixed with one tablespoon of vinegar or lemon juice.
→ How do I store the mini cakes?
Store the assembled cakes in an airtight container in the refrigerator for up to 3 days.
→ Can I freeze these mini cakes?
Yes, you can freeze the unassembled cakes. Just wrap them well and they can be frozen for up to a month.
Mini Red Velvet Layer Cakes
Created by: Arielle Baxter
Recipe Type: Bakery-Style Desserts
Skill Level: Intermediate
Final Quantity: 12 mini cakes
What You'll Need
For the Cakes
- 1 1/2 cups all-purpose flour
- 1 cup granulated sugar
- 1 teaspoon baking soda
- 1 teaspoon cocoa powder
- 1 teaspoon vanilla extract
- 1 cup vegetable oil
- 1 cup buttermilk
- 1 large egg
- 1 tablespoon red gel food coloring
- 1 teaspoon white vinegar
- 1/2 teaspoon salt
For the Cream Cheese Frosting
- 8 oz cream cheese, softened
- 1/2 cup unsalted butter, softened
- 4 cups powdered sugar
- 1 teaspoon vanilla extract
- 1-2 tablespoons milk (as needed)
How-To Steps
Preheat your oven to 350°F (175°C) and line a mini cake pan with parchment paper or grease it well.
In a bowl, whisk together the flour, sugar, baking soda, cocoa powder, and salt until evenly combined.
In another bowl, mix together the vegetable oil, buttermilk, egg, food coloring, and vinegar until smooth.
Gradually add the dry mixture to the wet mixture and stir until just combined. Do not overmix.
Divide the batter evenly among the mini cake pans, filling each about 2/3 full. Bake for 15 minutes or until a toothpick comes out clean.
While the cakes are cooling, beat the cream cheese and butter together until smooth. Gradually add powdered sugar and vanilla until you reach your desired consistency.
Once the cakes are completely cooled, remove them from the pans. Layer them with frosting in between each cake. Top with an extra dollop of frosting.
Extra Tips
- For a fun twist, try adding a hint of orange zest to the cream cheese frosting for extra flavor!
Nutritional Breakdown (Per Serving)
- Calories: 380 kcal
- Total Fat: 26g
- Saturated Fat: 15g
- Cholesterol: 195mg
- Sodium: 85mg
- Total Carbohydrates: 32g
- Dietary Fiber: 3g
- Sugars: 24g
- Protein: 6g