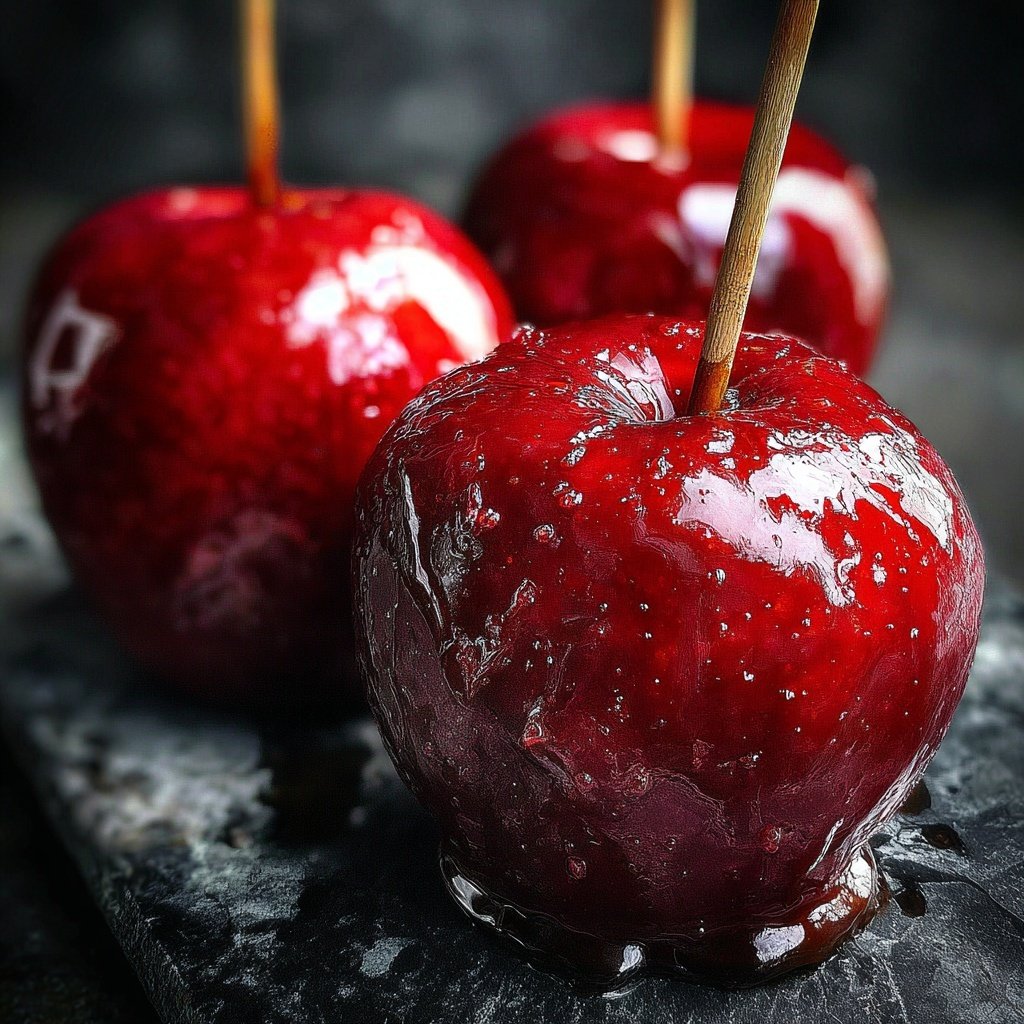
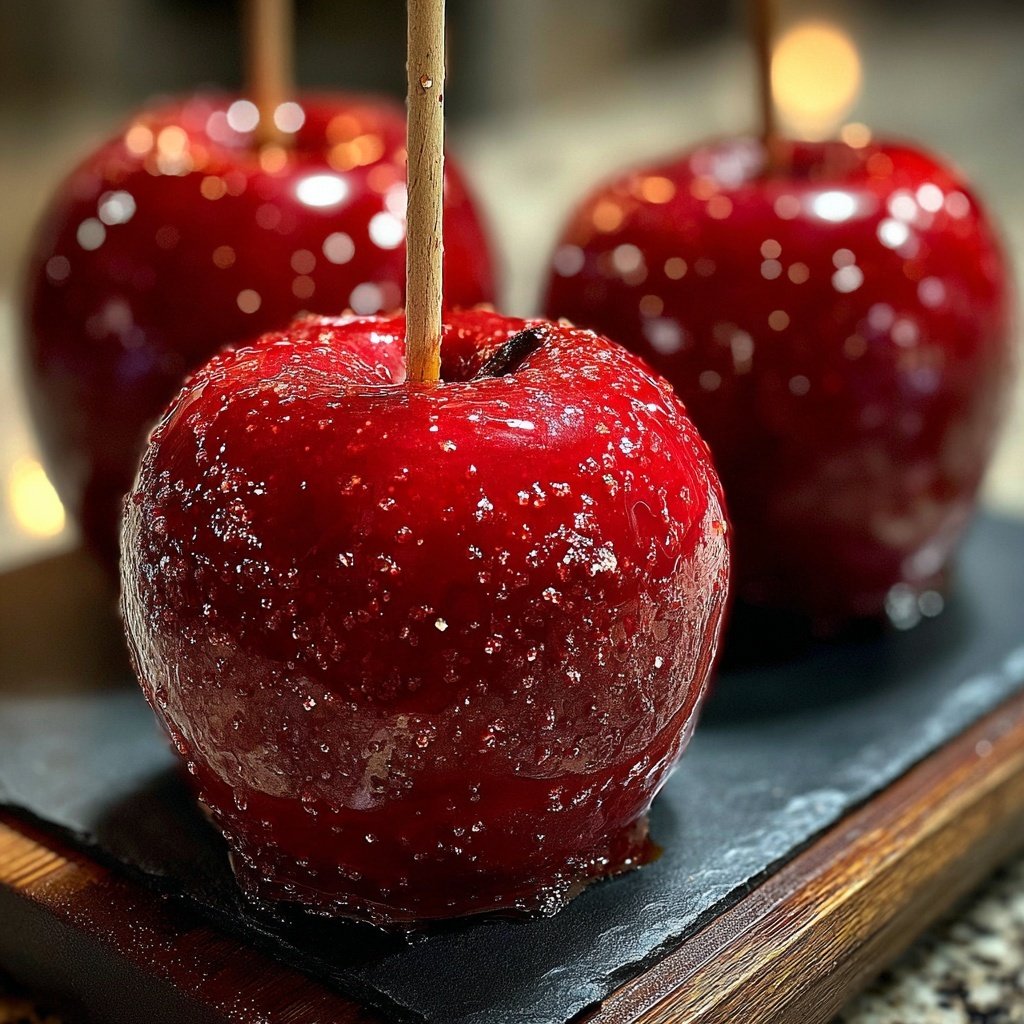
Classic Red Candy Apples
Highlighted under: Bakery-Style Desserts
I love making Classic Red Candy Apples because they are not only a delicious treat, but they also bring back childhood memories of fairs and carnivals. The bright red coating contrasts beautifully with the shiny apple underneath, creating a visually stunning dessert that is perfect for any occasion. Each bite is a delightful balance of sweet and tart, making it incredibly satisfying. I enjoy preparing these with my family, watching the transformation of ordinary apples into something extraordinary. Plus, there’s something magical about the candying process that I find truly mesmerizing.
I remember the first time I made Classic Red Candy Apples; it was during a fall festival, and the joy on everyone’s faces as they bit into that crisp, candy-coated exterior was unforgettable. I experimented with different types of apples to find the perfect balance, and I discovered that tart Granny Smith apples complement the sweetness of the candy coating beautifully.
One tip I found crucial is to ensure that the apples are completely dry before dipping them in the candy mixture. This way, the candy adheres better and forms that perfect shiny crust. Every time I bring out these treats, I am instantly reminded of the fun and warmth of family gatherings.
Why You'll Love These Candy Apples
- Nostalgic treat that reminds us of fairs and festivals
- Crisp apples complement the sweet candy surface perfectly
- Visually stunning dessert that impresses at gatherings
Key Techniques for Perfect Candy Apples
The success of your candy apples heavily relies on achieving the right temperature during the candying process. Use a candy thermometer to monitor the mixture's temperature closely. When it reaches 300°F, also known as the hard crack stage, it should appear clear and glossy, indicating that your candy coating will harden properly. This step is crucial because if the syrup is undercooked, it will be too sticky, and if overcooked, it will become brittle and break easily.
Proper preparation of the apples is equally important. Make sure to choose firm apples with no blemishes for the best texture. It's essential to wash them thoroughly to remove any wax, which can prevent the candy from adhering. I usually dry them completely as any moisture can cause the candy to slip off. Additionally, inserting the sticks at the right angle will help maintain stability during the coating process.
Ingredient Insights and Substitutions
While Granny Smith and Fuji apples are recommended for their crispness and balance of tartness, other apple varieties can also work. For a sweeter profile, consider using Honeycrisp or Gala apples. If you're looking to cater to different tastes, feel free to experiment with flavored extracts like almond or orange instead of vanilla, which can introduce a delightful twist to your candy apples.
The role of corn syrup in your candy coating is crucial; it prevents crystallization, ensuring a smooth finish. If you're out of corn syrup, you can substitute it with light molasses or golden syrup, although the flavor will differ slightly. Adjusting the red food coloring can also allow for a custom hue; however, ensure you use gel or liquid food coloring, as it won't dilute the syrup's consistency.
Ingredients
For the Candy Apples
- 6 medium apples (Granny Smith or Fuji preferred)
- 2 cups granulated sugar
- 1/2 cup light corn syrup
- 1/2 cup water
- 1 teaspoon red food coloring
- 1 teaspoon vanilla extract
- Lollipop sticks or wooden skewers
Instructions
Prepare the Apples
Wash and thoroughly dry the apples. Remove any stems and insert the lollipop sticks into the center of each apple, pushing them about halfway down.
Make the Candy Coating
In a medium saucepan over medium heat, combine sugar, corn syrup, and water. Stir until the sugar dissolves, then stop stirring and allow the mixture to boil until it reaches a temperature of 300°F (hard crack stage). This will take about 10 minutes.
Add Color and Flavor
Once the candy reaches 300°F, remove it from heat and carefully mix in the red food coloring and vanilla extract. Stir gently to combine.
Dip the Apples
Quickly dip each apple into the candy mixture, making sure to coat it evenly. Allow the excess candy to drip off before placing the candy-coated apples on a parchment-lined baking sheet.
Cool and Set
Let the apples cool at room temperature until the candy hardens. This should take about 10 minutes. Serve and enjoy your candy apples!
Pro Tips
- For a fun twist, you can sprinkle some crushed nuts or sprinkles on the still-wet candy coating before it hardens. Additionally, using different types of apples can introduce varying flavors to the candy apples.
Storage and Make-Ahead Tips
These candy apples are best enjoyed fresh, but if you have leftovers, store them in a cool, dry place in an airtight container. Avoid refrigeration, as moisture can cause the candy coating to become sticky. You can also make the candy coating ahead of time; just reheat it gently to return it to a pourable state before dipping the apples.
If you're planning a big event and want to make these candy apples in advance, I recommend preparing the apples and coating them the night before. Once they’re dipped, place them on a baking sheet lined with parchment paper to prevent sticking. As they cool and set, they can be stored in an unsealed container until you're ready to serve.
Serving Ideas and Variations
While the classic red candy apple is delightful on its own, you can elevate your presentation by adding toppings. Before the candy hardens, consider sprinkling crushed nuts, sprinkles, or even edible glitter to make them extra festive. This not only enhances their visual appeal but adds texture and a fun element to the experience.
For a more indulgent version, try dipping your candy-coated apples in melted chocolate or drizzle chocolate over the cooled apples for a layer of rich flavor. You can also incorporate flavored candy coatings, like caramel or butterscotch, for a delicious twist on the classic recipe. These variations offer endless possibilities and allow you to personalize each candy apple to your taste.
Questions About Recipes
→ Can I use different types of apples?
Absolutely! While Granny Smith and Fuji are recommended, any apple variety will work. Just choose ones that are firm and have a crisp texture.
→ How do I store leftover candy apples?
Store them in a cool, dry place at room temperature. Avoid refrigerating them as the moisture may cause the candy to soften.
→ Can I make these candy apples in advance?
Yes, you can make them a day in advance. Just be sure to store them properly to maintain their crispness.
→ What can I do if the candy mixture crystallizes?
If the candy crystallizes, try adding a few drops of lemon juice to the mixture and stirring gently over low heat until it melts again.
Classic Red Candy Apples
Created by: Arielle Baxter
Recipe Type: Bakery-Style Desserts
Skill Level: Intermediate
Final Quantity: 6 servings
What You'll Need
For the Candy Apples
- 6 medium apples (Granny Smith or Fuji preferred)
- 2 cups granulated sugar
- 1/2 cup light corn syrup
- 1/2 cup water
- 1 teaspoon red food coloring
- 1 teaspoon vanilla extract
- Lollipop sticks or wooden skewers
How-To Steps
Wash and thoroughly dry the apples. Remove any stems and insert the lollipop sticks into the center of each apple, pushing them about halfway down.
In a medium saucepan over medium heat, combine sugar, corn syrup, and water. Stir until the sugar dissolves, then stop stirring and allow the mixture to boil until it reaches a temperature of 300°F (hard crack stage). This will take about 10 minutes.
Once the candy reaches 300°F, remove it from heat and carefully mix in the red food coloring and vanilla extract. Stir gently to combine.
Quickly dip each apple into the candy mixture, making sure to coat it evenly. Allow the excess candy to drip off before placing the candy-coated apples on a parchment-lined baking sheet.
Let the apples cool at room temperature until the candy hardens. This should take about 10 minutes. Serve and enjoy your candy apples!
Extra Tips
- For a fun twist, you can sprinkle some crushed nuts or sprinkles on the still-wet candy coating before it hardens. Additionally, using different types of apples can introduce varying flavors to the candy apples.
Nutritional Breakdown (Per Serving)
- Calories: 250 kcal
- Total Fat: 0g
- Saturated Fat: 0g
- Cholesterol: 0mg
- Sodium: 20mg
- Total Carbohydrates: 65g
- Dietary Fiber: 3g
- Sugars: 62g
- Protein: 0g