Mini Red Velvet Layer Cakes
Highlighted under: Bakery-Style Desserts
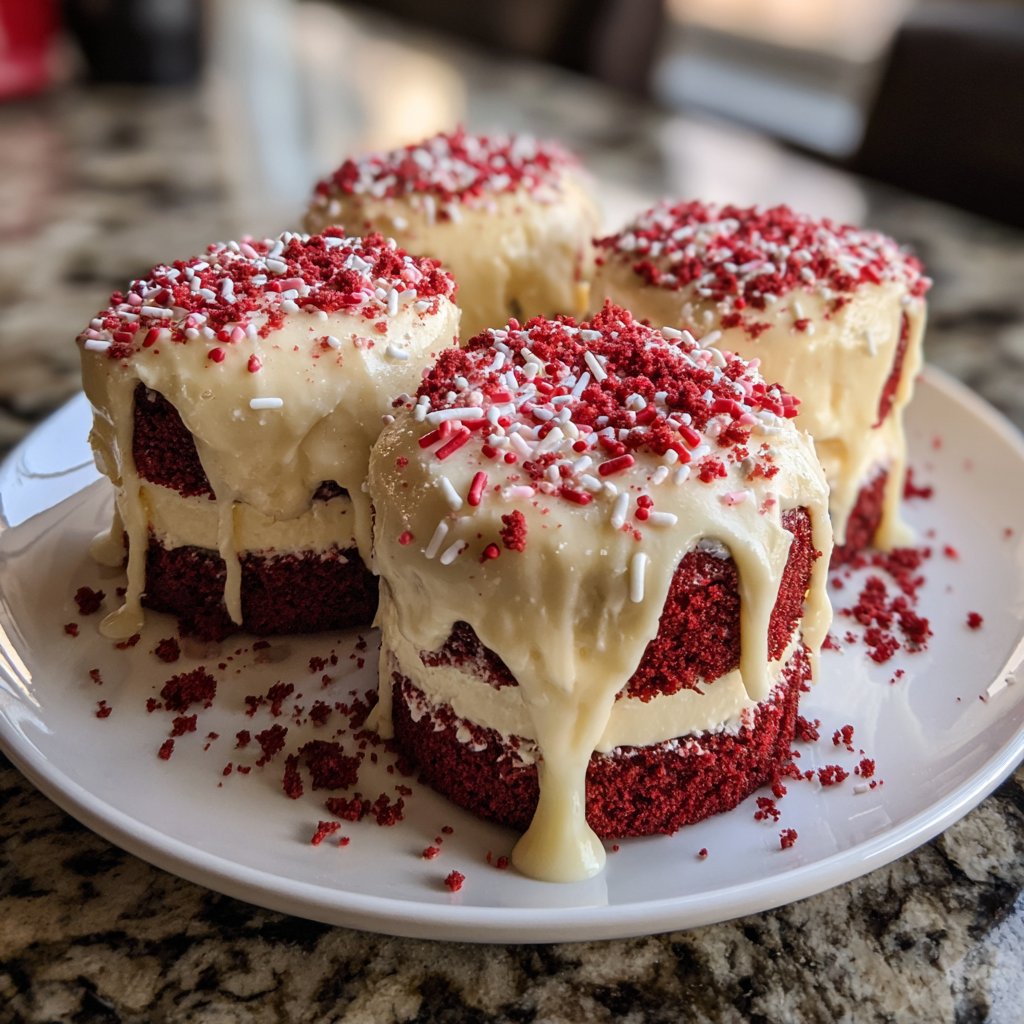
I absolutely love making Mini Red Velvet Layer Cakes for special occasions. These delightful little cakes bring together the rich flavors of red velvet with a creamy frosting in an adorable, bite-sized format. The vibrant color and fun presentation make them a hit at any gathering, and I find that they are surprisingly easy to whip up. Each layer is soft, moist, and filled with pure deliciousness, making it hard to resist going back for more. Trust me, these beauties will quickly become a favorite in your dessert repertoire!
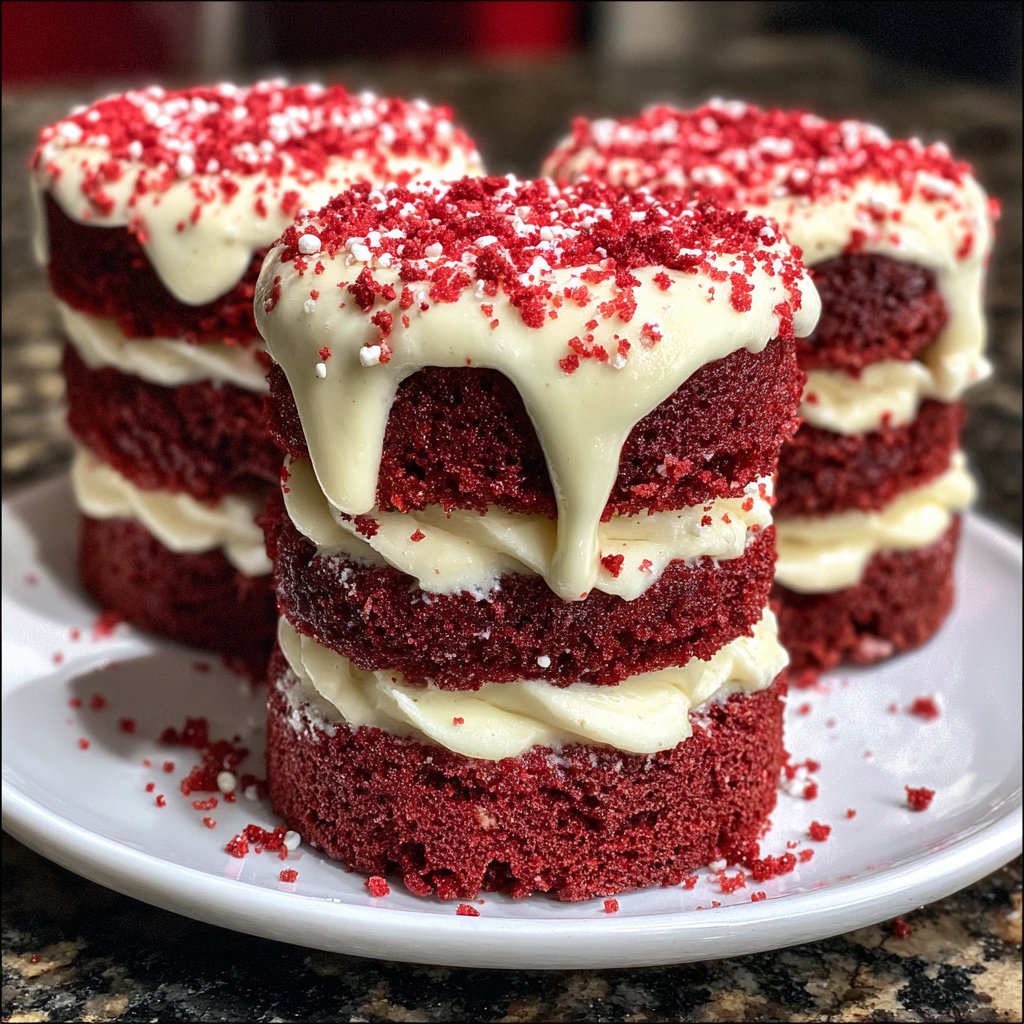
When I first experimented with Mini Red Velvet Layer Cakes, I was amazed at how fun and delicious they turned out. I chose to make them mini so everyone could enjoy their own little cake without feeling guilty. The secret lies in the buttermilk, which not only enhances the flavor but also keeps the cakes incredibly moist. Each layer is stacked high with cream cheese frosting, adding a rich and tangy contrast to the sweet cake.
During my recipe trials, I discovered that using a ring mold made the layering process easier and more uniform. By chilling the cakes briefly before frosting, they firm up just enough to hold their shape. This technique ensures that each cake has a stunning presentation. Trust me, once you master these, you'll want to make them for every celebration!
Why You'll Love This Recipe
- Rich chocolate flavor paired with fresh orange zest
- Creamy texture that melts in your mouth
- Perfect for celebrations or as a sweet indulgence
Mastering the Red Velvet Batter
Getting the right texture in your mini red velvet layer cakes starts with understanding the role of each ingredient. All-purpose flour provides structure, while the buttermilk and oil together create a moist crumb. If you're looking for a lighter feel, consider using cake flour, which can make the cakes even fluffier. Make sure your eggs and buttermilk are at room temperature to ensure they blend smoothly with the other ingredients, preventing any lumps in your batter.
When mixing your batter, be cautious not to overmix after combining the dry and wet ingredients. Overmixing can develop gluten, leading to denser cakes. Instead, mix until just incorporated, which usually takes about 30 seconds. You want the batter to be smooth and slightly thick yet pourable. The beautiful red color is achieved not only through red food coloring but also by the chocolate undertones from cocoa powder, giving a rich flavor that complements the sweet frosting.
Frosting Tips and Variations
The cream cheese frosting is a highlight of this recipe, providing a tangy contrast to the sweetness of the cakes. To ensure your frosting is perfectly creamy and spreadable, make sure both the cream cheese and butter are softened at room temperature. This usually takes about an hour out of the fridge. When beating them together, you'll want to beat at medium speed until light and fluffy, which should take around 2-3 minutes.
For a twist on the traditional cream cheese frosting, consider incorporating flavors such as lemon zest or a splash of almond extract to complement the red velvet. Additionally, you can fold in mini chocolate chips or crushed nuts for added texture. If your frosting seems too thick, add milk, one tablespoon at a time, until you reach your desired consistency. On the other hand, if it’s too thin, you can add more powdered sugar gradually.
Ingredients
For the Mini Cakes
- 1 1/2 cups all-purpose flour
- 1 cup granulated sugar
- 1 tsp baking soda
- 1/2 tsp salt
- 1 tsp cocoa powder
- 1 cup vegetable oil
- 1 cup buttermilk, room temperature
- 2 large eggs, room temperature
- 2 tbsp red food coloring
- 1 tsp vanilla extract
- 1 tsp white vinegar
For the Cream Cheese Frosting
- 8 oz cream cheese, softened
- 1/2 cup unsalted butter, softened
- 4 cups powdered sugar
- 1 tsp vanilla extract
- 2 tbsp milk (as needed)
Instructions
Prepare the Batter
Preheat your oven to 350°F (175°C) and line a muffin tin with mini cupcake liners. In a bowl, whisk together the flour, sugar, baking soda, salt, and cocoa powder. In a separate bowl, mix the oil, buttermilk, eggs, food coloring, vanilla, and vinegar until smooth. Combine both mixtures and mix until just incorporated.
Bake the Cakes
Divide the batter evenly among the mini cupcake liners, filling each about two-thirds full. Bake for 20-25 minutes, or until a toothpick inserted into the center comes out clean. Allow the cakes to cool in the pan for 5 minutes before transferring them to a wire rack to cool completely.
Make the Frosting
While the cakes cool, make the cream cheese frosting. In a large mixing bowl, beat the softened cream cheese and butter together until light and fluffy. Gradually add the powdered sugar and mix until smooth. Stir in the vanilla and adjust the consistency with milk if necessary.
Layer the Cakes
Once the cakes are completely cool, use a round cutter to cut the tops off to create an even surface. Place one layer on a serving plate, add a layer of frosting, then stack a second cake on top. Repeat this process until each mini cake has three layers, finishing with a generous dollop of frosting on top.
Serve
Decorate the top of each mini cake with additional frosting or sprinkles if desired. Serve and enjoy these deliciously cute Mini Red Velvet Layer Cakes!
Pro Tips
- For best results, ensure your ingredients are at room temperature, and don’t overmix the batter to keep the cakes tender.
Storage and Make-Ahead Tips
These mini red velvet layer cakes can be made ahead of time, making them a great option for parties or special occasions. Once baked and cooled, the individual cakes can be stored in an airtight container at room temperature for up to two days. For longer storage, wrap each cake tightly in plastic wrap and freeze them separated by parchment paper. They can be frozen for up to two months and thawed overnight in the refrigerator before frosting and serving.
If you happen to have leftover frosted cakes, storing them in an airtight container in the fridge is ideal, but they should be consumed within three days for the best flavor and texture. When serving leftovers, allow them to sit at room temperature for about 15-20 minutes to restore their softness before enjoying.
Scaling Up the Recipe
If you want to make a larger batch of mini red velvet cakes, scaling the recipe is simple. Just multiply the ingredient amounts based on the number of cakes you wish to create. Be mindful of your oven space, as you may need to bake in batches. Each batch of mini cakes will still require approximately the same baking time, but it's essential to check for doneness with a toothpick since oven temperatures can vary.
Alternatively, you can also use a mini layer cake pan to create a larger centerpiece cake that follows the same layering technique. Just be aware that larger cakes will need more frosting, so adjust accordingly. The visual impact of a larger red velvet cake can be stunning, especially when decorated with chocolate shavings or edible flowers.
Questions About Recipes
→ Can I use a different type of food coloring?
Yes, you can use any liquid food coloring to achieve a lovely color, just keep in mind that it might affect the flavor slightly.
→ How do I store leftover mini cakes?
Store them in an airtight container in the refrigerator for up to 3 days. Allow them to come to room temperature before serving.
→ Can I make a larger version of this cake?
Absolutely! You can double the ingredients and bake in a larger cake pan; just adjust the baking time accordingly.
→ Is there a dairy-free option for the frosting?
Yes, you can substitute the cream cheese with a dairy-free cream cheese alternative and use vegan butter for the frosting.
Mini Red Velvet Layer Cakes
Created by: Arielle Baxter
Recipe Type: Bakery-Style Desserts
Skill Level: Intermediate
Final Quantity: 12 mini cakes
What You'll Need
For the Mini Cakes
- 1 1/2 cups all-purpose flour
- 1 cup granulated sugar
- 1 tsp baking soda
- 1/2 tsp salt
- 1 tsp cocoa powder
- 1 cup vegetable oil
- 1 cup buttermilk, room temperature
- 2 large eggs, room temperature
- 2 tbsp red food coloring
- 1 tsp vanilla extract
- 1 tsp white vinegar
For the Cream Cheese Frosting
- 8 oz cream cheese, softened
- 1/2 cup unsalted butter, softened
- 4 cups powdered sugar
- 1 tsp vanilla extract
- 2 tbsp milk (as needed)
How-To Steps
Preheat your oven to 350°F (175°C) and line a muffin tin with mini cupcake liners. In a bowl, whisk together the flour, sugar, baking soda, salt, and cocoa powder. In a separate bowl, mix the oil, buttermilk, eggs, food coloring, vanilla, and vinegar until smooth. Combine both mixtures and mix until just incorporated.
Divide the batter evenly among the mini cupcake liners, filling each about two-thirds full. Bake for 20-25 minutes, or until a toothpick inserted into the center comes out clean. Allow the cakes to cool in the pan for 5 minutes before transferring them to a wire rack to cool completely.
While the cakes cool, make the cream cheese frosting. In a large mixing bowl, beat the softened cream cheese and butter together until light and fluffy. Gradually add the powdered sugar and mix until smooth. Stir in the vanilla and adjust the consistency with milk if necessary.
Once the cakes are completely cool, use a round cutter to cut the tops off to create an even surface. Place one layer on a serving plate, add a layer of frosting, then stack a second cake on top. Repeat this process until each mini cake has three layers, finishing with a generous dollop of frosting on top.
Decorate the top of each mini cake with additional frosting or sprinkles if desired. Serve and enjoy these deliciously cute Mini Red Velvet Layer Cakes!
Extra Tips
- For best results, ensure your ingredients are at room temperature, and don’t overmix the batter to keep the cakes tender.
Nutritional Breakdown (Per Serving)
- Calories: 380 kcal
- Total Fat: 26g
- Saturated Fat: 15g
- Cholesterol: 195mg
- Sodium: 85mg
- Total Carbohydrates: 32g
- Dietary Fiber: 3g
- Sugars: 24g
- Protein: 6g